Use ‘jpegoptim’ to optimize/re-compress your jpg images

I use optipng and jpegoptim to help me compress/optimize my jpg/png images.

For png images re-compression, please refer to:

jpegoptim supports many platform, including Solaris, Mac OS X and Windows, of course FreeBSD and Linux, here is its git repository on GitHub:
https://github.com/tjko/jpegoptim

How to install?

FreeBSD:

$ sudo pkg install jpegoptim

For Debian/Ubuntu based GNU/Linux:

$ sudo apt-get install jpegoptim

For CentOS/RHEL/Fedora based GNU/Linux

$ sudo yum install jpegoptim

(on CentOS/RHEL, please enable EPEL repo first)

How to use?

$ jpegoptim image.jpg

By default, jpegoptim uses ‘lossless‘ mode to re-compress the jpeg images, which means the optimized images will have the same quality just like it was, to make the images smaller, you can use -m<quality>, --max=<quality> to enable lossy optimize by setting its quality, the valid range is 0 – 100, for example, set quality = 90:

$ jpegoptim -m 90 example.jpg

Note that the files that already have lower quality setting will be compressed using the lossless optimization method.

You can also use `find` to help you compress all the jpeg images:

$ find /path/to/imgs -name "*.jpg" -exec jpegoptim -m 90 {} \;

Using this picture on Wikipedia as an exmaple: https://wikipedia.org/wiki/File:JPEG_example_donkey_100.jpg
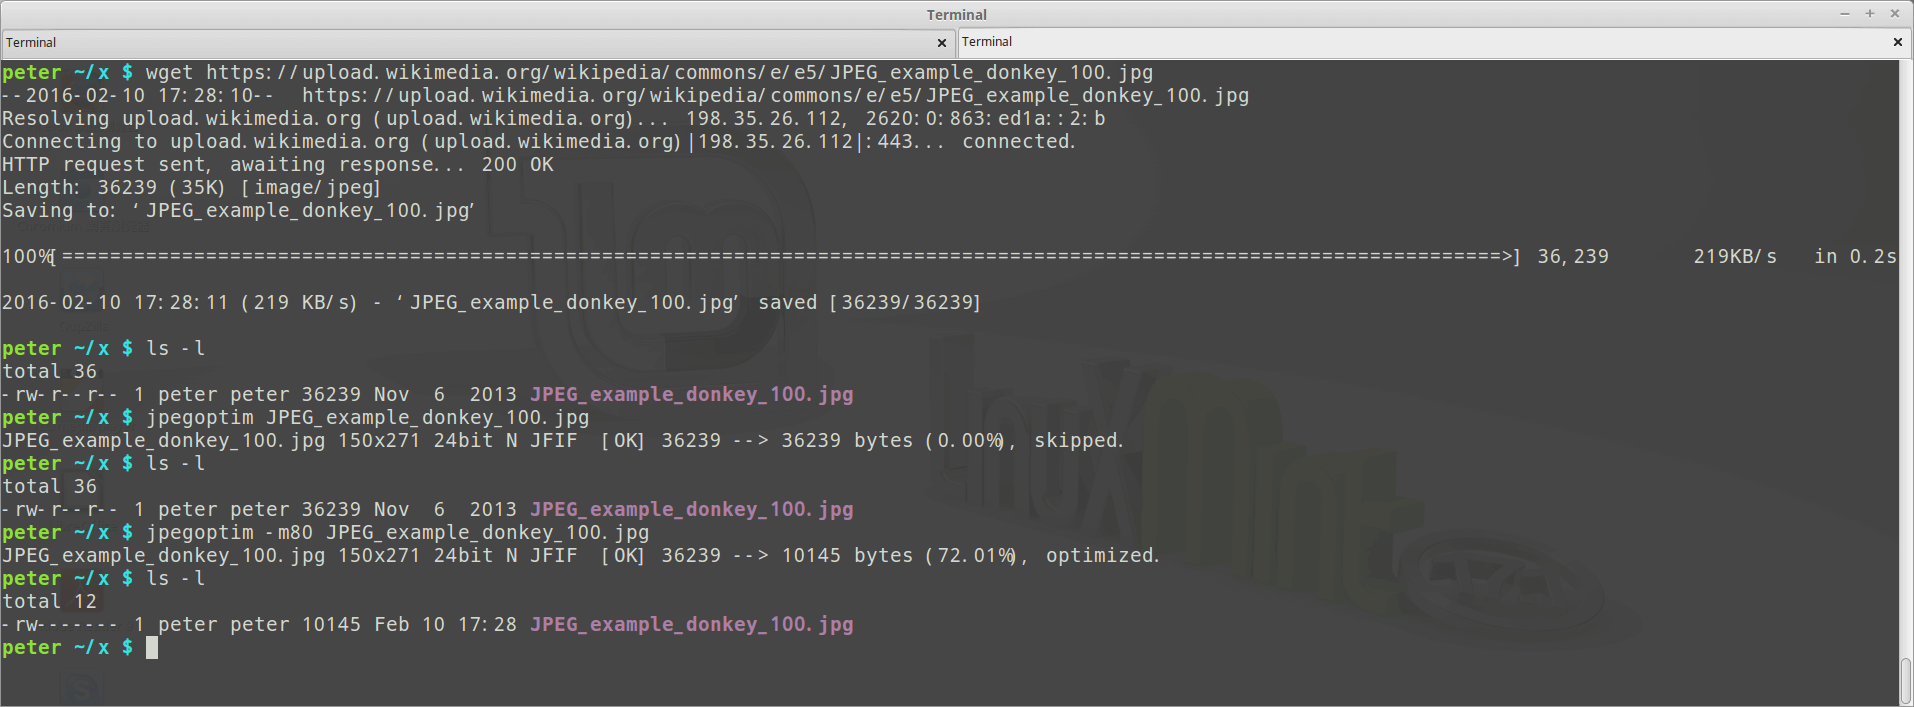
jpegoptim-example

Before the compression, 36239 bytes (about 36 KB):

JPEG_example_donkey_100


After the compression, 10145 bytes (about 10 KB):

JPEG_example_donkey_80

Can you recognize which one has better/lower quality? :D

The easiest command to compress pdf file

We use pdftk here, pdftk stands for PDF toolkits, is a cross-platform tool for manipulating PDF files.

How to install pdftk?

$ sudo pkg install pdftk # on FreeBSD
$ sudo apt-get install pdftk # on Debian / Ubuntu based GNU/Linux

How to compress PDF via pdftk?

$ pdftk input.pdf output output.pdf compress

You can also decompress by replacing ‘compress’ keyword with ‘uncompress’

$ pdftk input.pdf output output.pdf uncompress

That’s all. Notes that the compression usually works with images only, may not work on the file only contains text and simple shapes.

Use ‘optipng’ to optimize/re-compress your png images losslessly!

OptiPNG is a useful tool to compress png images without loss its quality, it really help reduce the bandwidth, diskspace and the loading/response time for website. I used it to re-compress all the png images on cdnjs and successfully made 206857 images smaller(see cdnjs/cdnjs@e936c87e9044fd2b123).

It’s easy to use, you can install it via apt-get, or download and build it from source :
$ sudo apt-get install optipng

Usage:
$ optipng example.png

The default compress level is 2, the range is 0~7 (may depends on the version you are using), I will always use the highest and slowest level:
$ optipng -o7 example.png

Find all the png images to compress:
$ find path -name "*.png" -exec optipng -o7 {} \;

In fact, optipng can convert BMP, GIF, PNM and TIFF format image to optimized optimized png, and also performs PNG integrity checks and corrections, very nice.

Use multiple CPU thread/core to make tar compression faster

On many unix like systems, tar is a widely used tool to package and compress files, almost built-in in the all common Linux and BSD distribution, however, tar always spends a lot of time on file compression, because the programs itself doesn’t support multi-thread compressing, but fortunately, tar supports to use specified external program to compress file(s), which means we can use the programs support multi-thread compressing with higher speed!

From the tar manual (man tar), we can see:

-I, –use-compress-program PROG
filter through PROG (must accept -d)

With parameter -I or --use-compress-program, we can select the extermal compressor program we’d like to use.

The three tools for parallel compression I will use today, all can be easy installed via apt install under Debian/Ubuntu based GNU/Linux distributions, here are the commands and corresponding apt package name, please note that new versions of Ubuntu and Debian no longer have pxz package, but pixz can do the similar thing:

  • gz:   pigz
  • bz2: pbzip2
  • xz:   pxz, pixz

Originally commands to tar with compression will be look like:

  • gz:   tar -czf tarball.tgz files
  • bz2: tar -cjf tarball.tbz files
  • xz:   tar -cJf tarball.txz files

The multi-thread version:

  • gz:   tar -I pigz -cf tarball.tgz files
  • bz2: tar -I pbzip2 -cf tarball.tbz files
  • xz:   tar -I pixz -cf tarball.txz files
  • xz:   tar -I pxz -cf tarball.txz files

I am going to use Linux kernel v3.18.6 as compression example, threw the whole directory on the ramdisk to compress them, and then compare the difference!
(PS: CPU is Intel(R) Xeon(R) CPU E3-1220 V2 @ 3.10GHz, 4 cores, 4 threads, 16GB ram)

Result comparison:

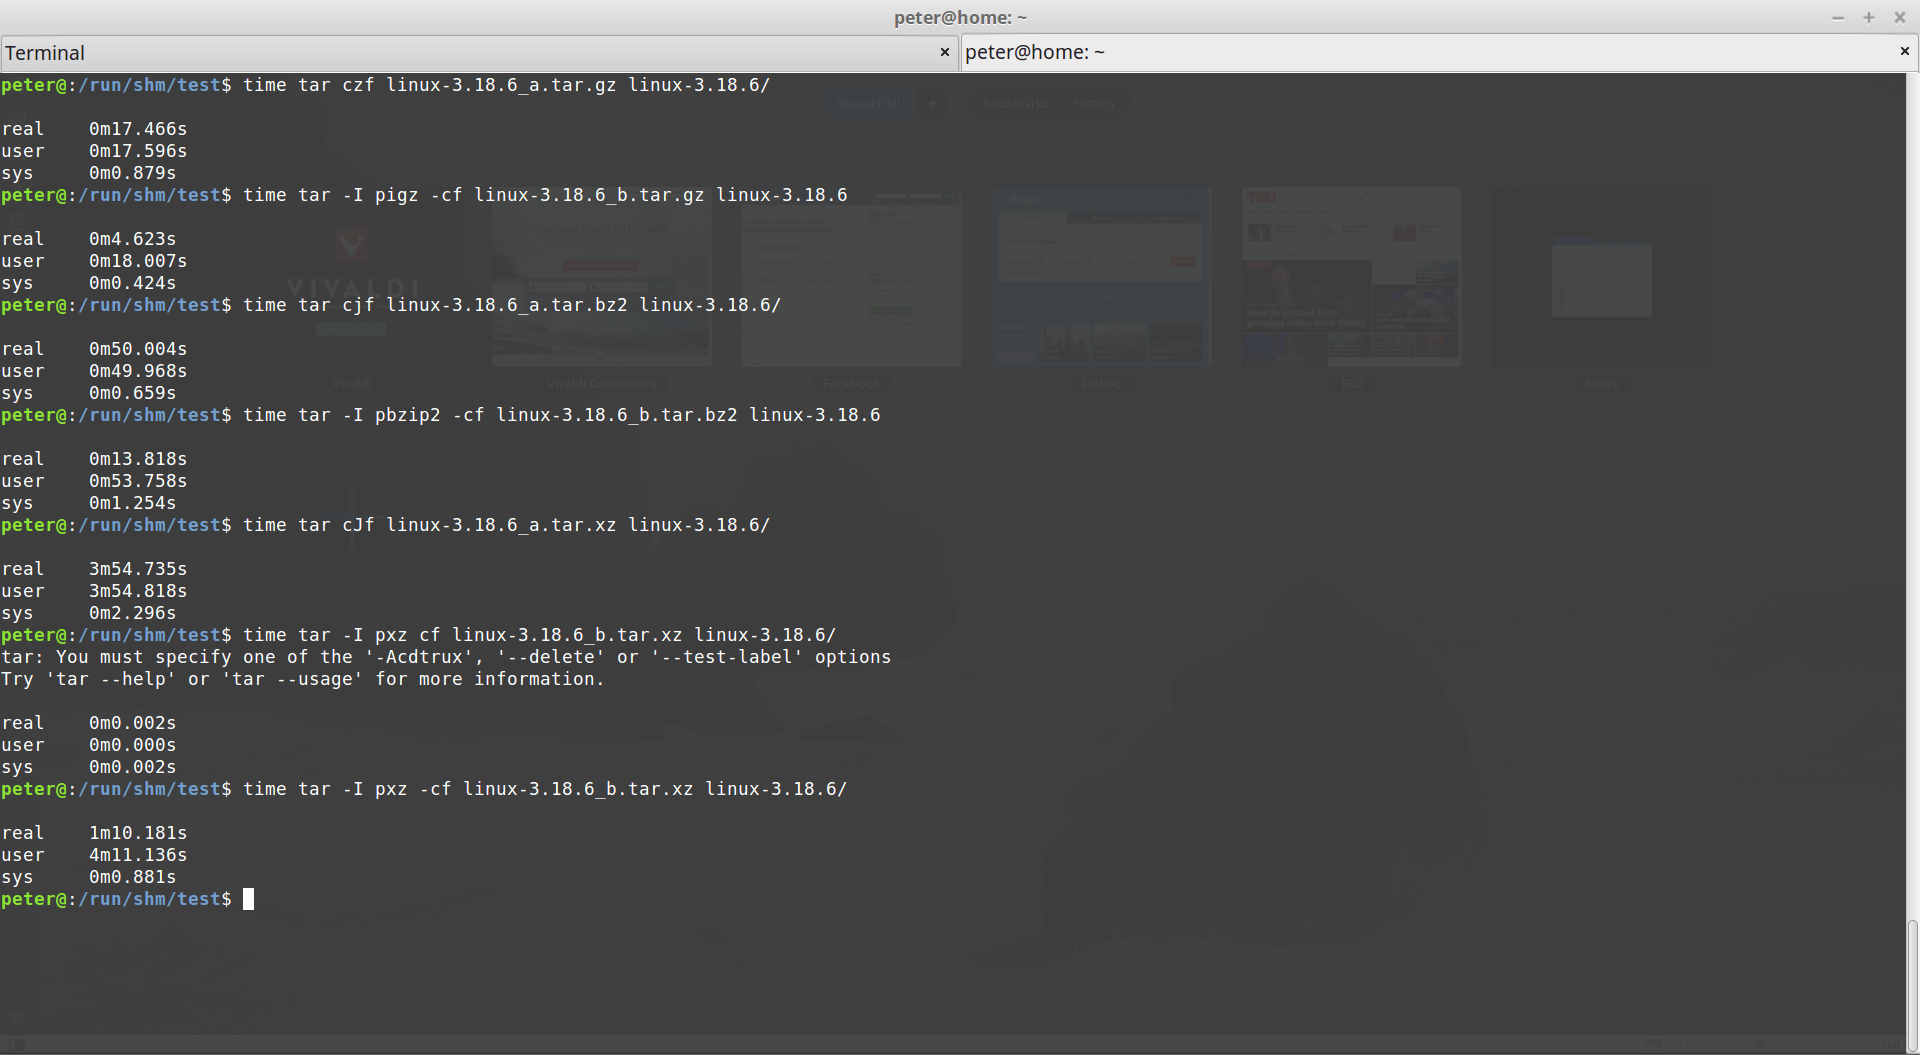
tarCompressComparison1

Time spent:
.                                  gzip         bzip2                    xz
Single-thread       17.466s     50.004s       3m54.735s
Multi-thread           4.623s      13.818s       1m10.181s
How faster ?          3.78x          3.62x                3.34x

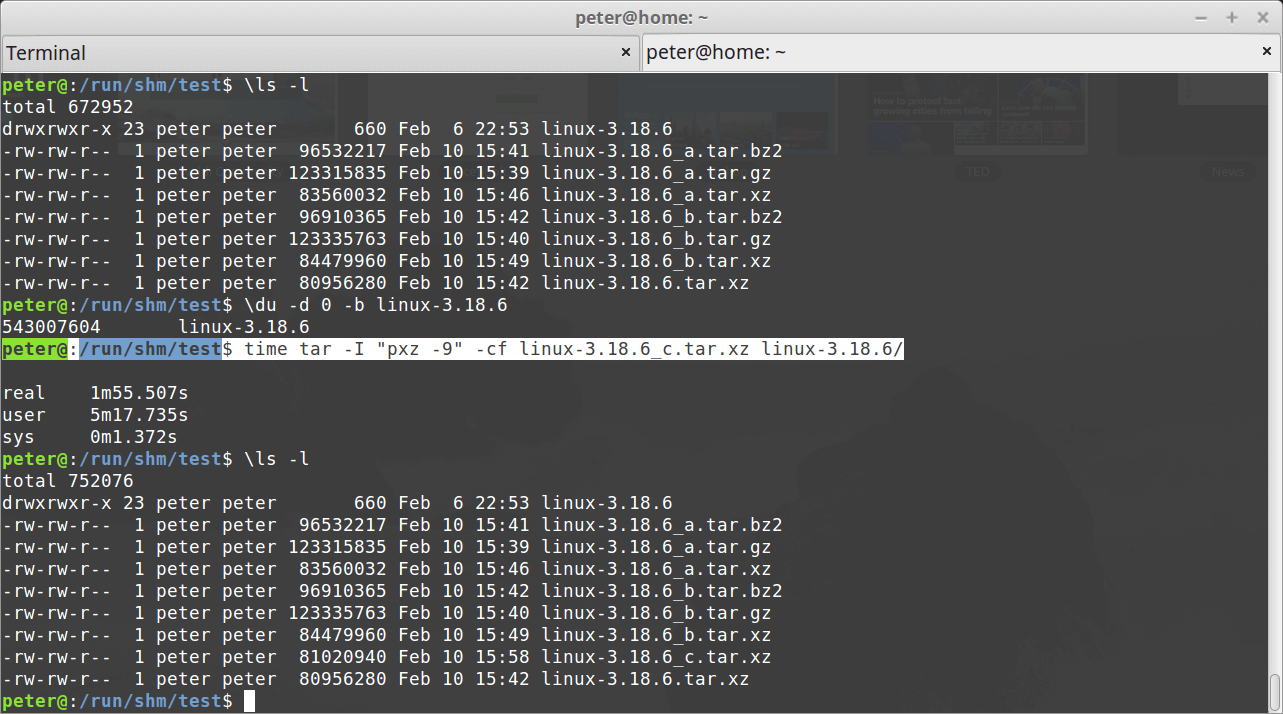
Because I didn’t specify the compressor parameter, just let them use the default compress level, so the result file size may be a little bit different, but quite close, we still can add parameters to the external compression project like this: tar -I "pixz -9" -cf tarball.txz files, just quote the command with its argument, which is also pretty easy.

tarCompressComparison2

With parameter -9 to increase the compress level, it might need more memory when compressing, the result will become 81020940 bytes but not 84479960 bytes, so we can save additional 3.3 mega bytes! (also spent 40 more secs, you decide it!)

This is very useful for me!!!