Roseapple Pi 蓮霧派 效能簡測 (benchmark)

有關之前玩的蓮霧派(Roseapple Pi):

https://www.peterdavehello.org/2016/02/roseapple-pi-rapi-a-clone-of-raspberry-pi/

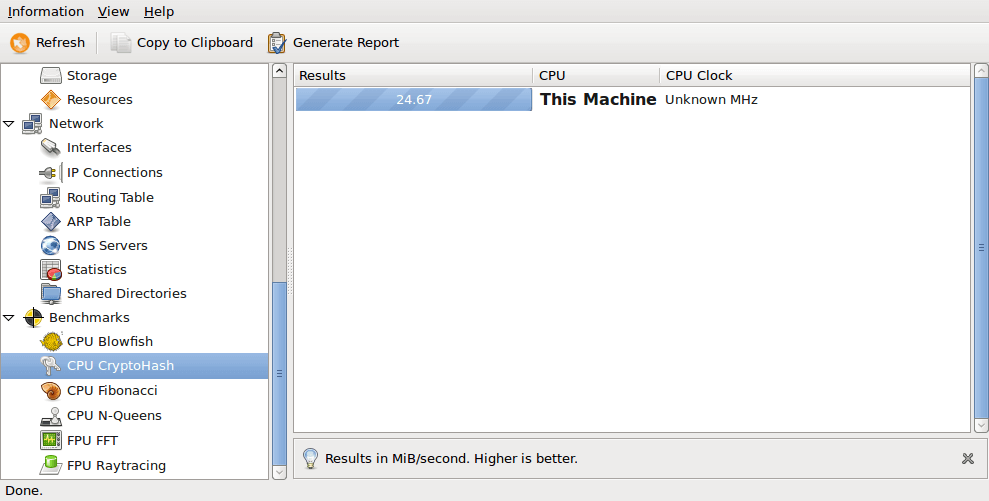
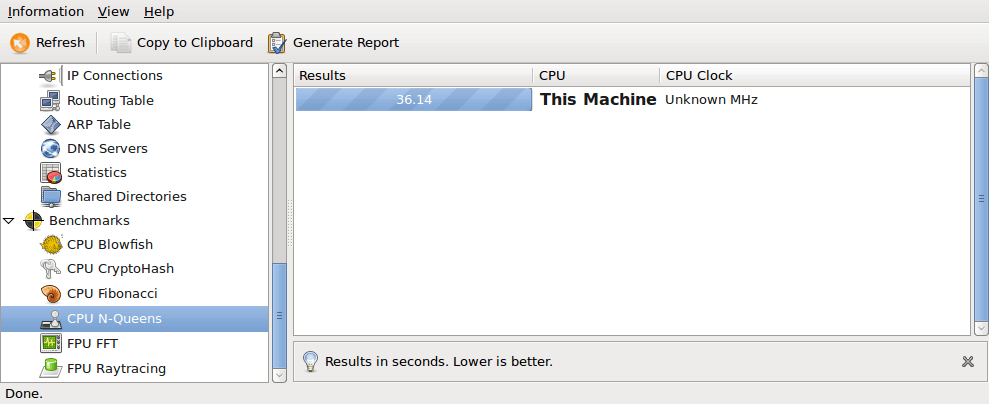
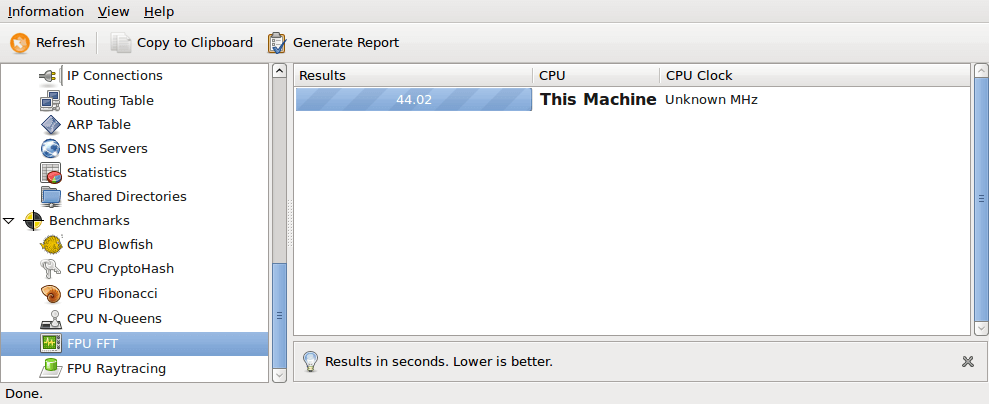
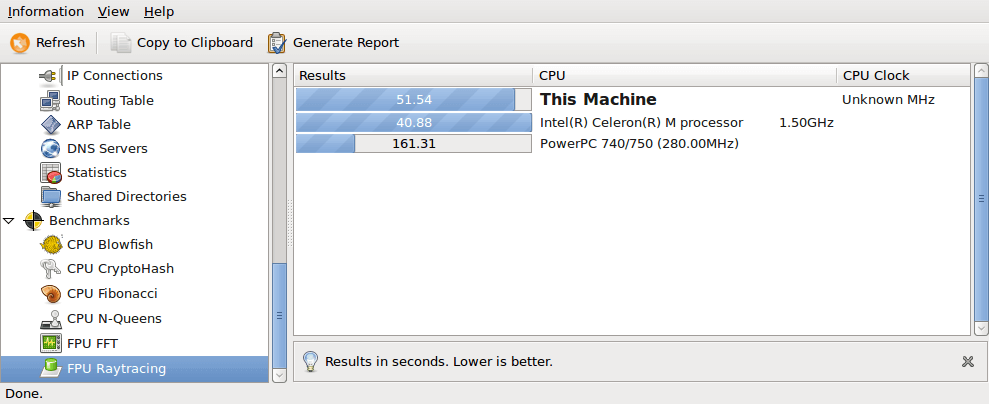
原先是想做一些仔細的效能測試,無奈最近實在太忙,身不由己,懶得詳測了 … 直接上圖吧,分別是在 Debian 底下用 Hardinfo 、sysbench、PHP benchmark Script 以及在 Android 底下用 QuadrantAntutu (安兔兔) 的效能”簡”測結果,比較詳細的測試,以後有緣再說囉。

系統環境的部份都和上一篇的開箱環境基本上都相同,也就是 Debian 8.1 和 Android 5.1.1,相關的映像檔資訊有需要請直接參考上面的連結。

先看在 Debian 8.1 Jessie 底下的測試結果:

Debian, Hardinfo, 直接看圖:

Debian, PHP benchmark Script using php 5.6.17:

--------------------------------------
| PHP BENCHMARK SCRIPT |
--------------------------------------
Start : 2016-02-22 13:51:08
Server : @
PHP version : 5.6.17-0+deb8u1
Platform : Linux
--------------------------------------
test_math : 8.409 sec.
test_stringmanipulation : 8.321 sec.
test_loops : 6.907 sec.
test_ifelse : 4.479 sec.
--------------------------------------
Total time: : 28.116 sec.

Debian, PHP benchmark Script using php 7.0.3 (Using Debian testing repository):

--------------------------------------
| PHP BENCHMARK SCRIPT |
--------------------------------------
Start : 2016-02-22 14:15:05
Server : @
PHP version : 7.0.3-3
Platform : Linux
--------------------------------------
test_math : 2.422 sec.
test_stringmanipulation : 3.245 sec.
test_loops : 3.002 sec.
test_ifelse : 1.955 sec.
--------------------------------------
Total time: : 10.624 sec.

上面兩個結果可以看出 PHP 7.0 的效能進步真的很大!有在寫 PHP 或 Web 相關應用的人可以當作參考。

Debian, sysbench --test=cpu --cpu-max-prime=20000 run (single-thread, 單核心):

閱讀全文

Step by step, install Ubuntu 14.04 Server on VirtualBox 虛擬機安裝紀錄

先前分享過 FreeBSD 在虛擬機上的安裝:

https://www.peterdavehello.org/2016/01/freebsd-10-2-on-virtualbox-vm-notes/

這次換寫 Ubuntu Server 的安裝,Ubuntu Server (伺服器版) 和 Ubuntu Desktop (桌面版) 的主要差異其實只有兩點:

  1. 預設安裝的套件不同
  2. 操作介面不同

就像 Ubuntu 、 Kubuntu、Lubuntu、Xubuntu 、 Ubuntu Gnome 都是 Ubuntu GNU/Linux ,使用相同的 Ubuntu apt repository,但預設使用不同的設訂、安裝了不同的桌面環境,但骨子裡都是一樣的系統,Ubuntu Server / Desktop 的關係也是這樣,少了圖形化介面以後 Server 可以省下更多的資源來提供服務,在大多數情況下也可以省下不少的硬碟空間來儲存更多的資料,身邊有些朋友因為害怕純文字介面的操作而使用桌面版的系統來架設伺服器,讓不必要的圖行化介面佔用系統資源,是有點可惜了,這篇以 VirtualBox 虛擬機環境紀錄 Ubuntu Server 14.04 的安裝,給新手做為安裝時的參考

如果想要把已經安裝好的 Ubuntu Desktop 轉換為 Ubuntu Server、在不同桌面環境間的版本轉換,可以參考這篇:

https://www.peterdavehello.org/2015/09/convert-your-ubuntudebian-between-different-versions-like-desktop-to-server/

先說 Ubuntu 安裝程式的下載, 關方有提供一個 mirror 鏡像站列表,直接從台灣的伺服器下載速度會比較快:
https://launchpad.net/ubuntu/+cdmirrors

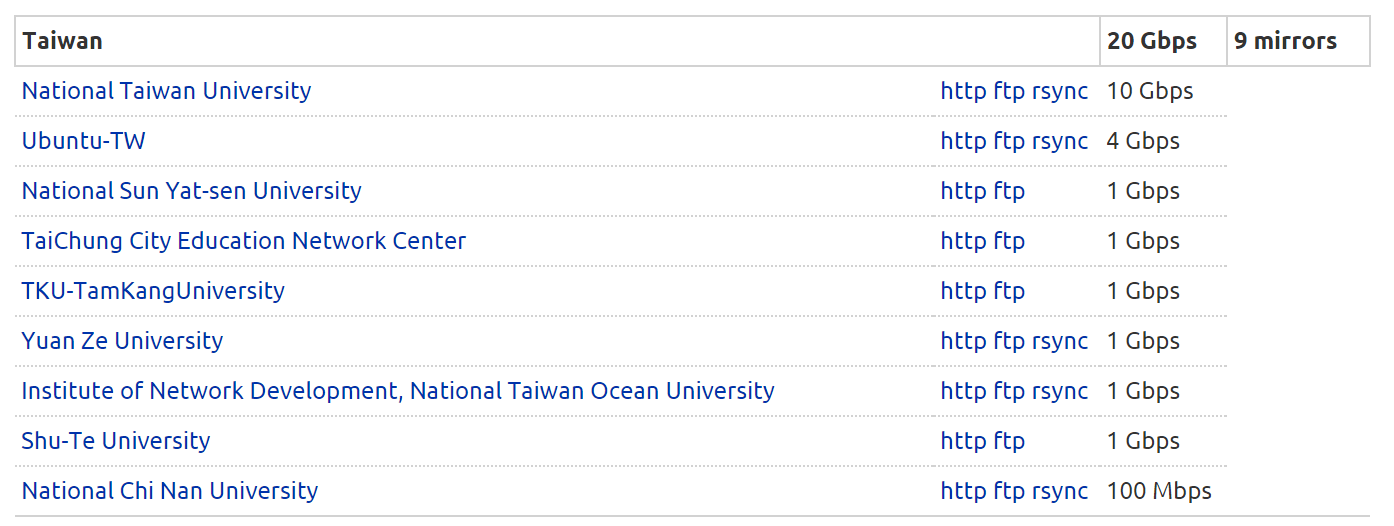
往下拉到 “Taiwan” 的地方,可以看到台灣目前有九個已向官方登記的站台,任意挑選其中一個站台的 http 連結進入即可。ubuntu taiwan cd mirrors

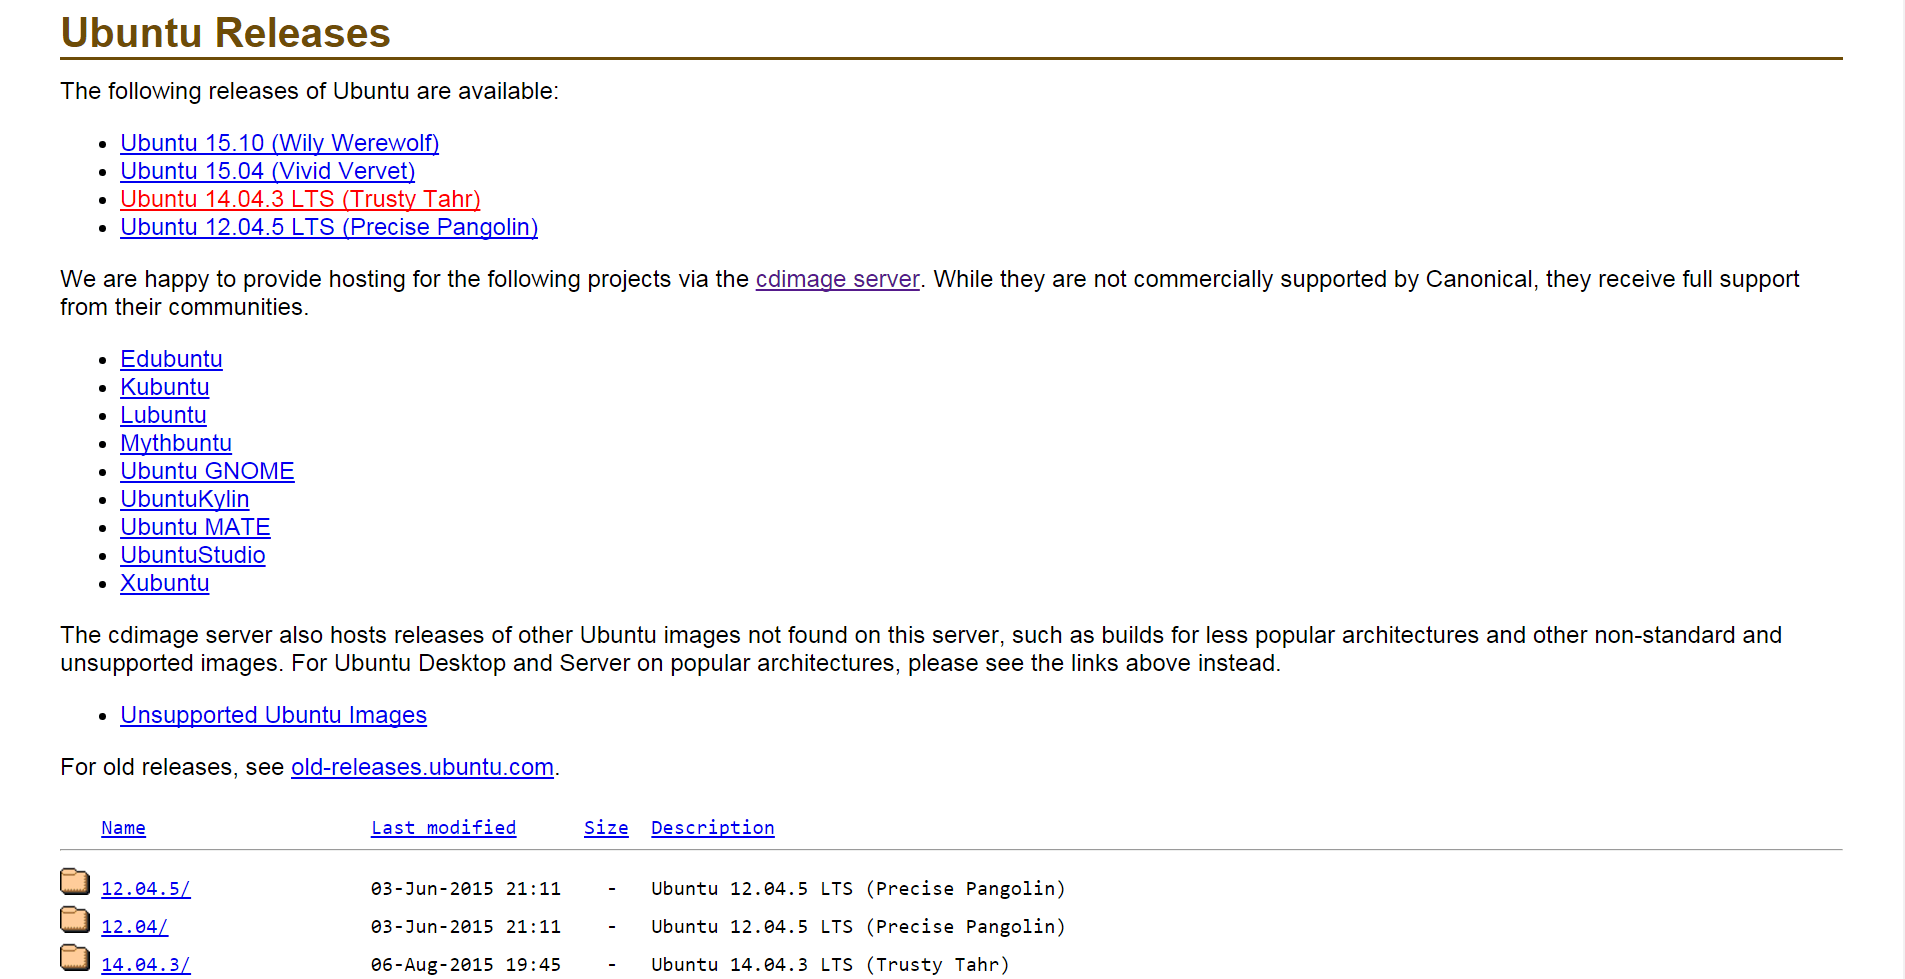
這邊以元智大學的FTP站台為例 (http://ftp.yzu.edu.tw/Linux/ubuntu-releases/),點進去後會看到這樣的畫面(每個站台應該是大同小異):ubuntu download homepage

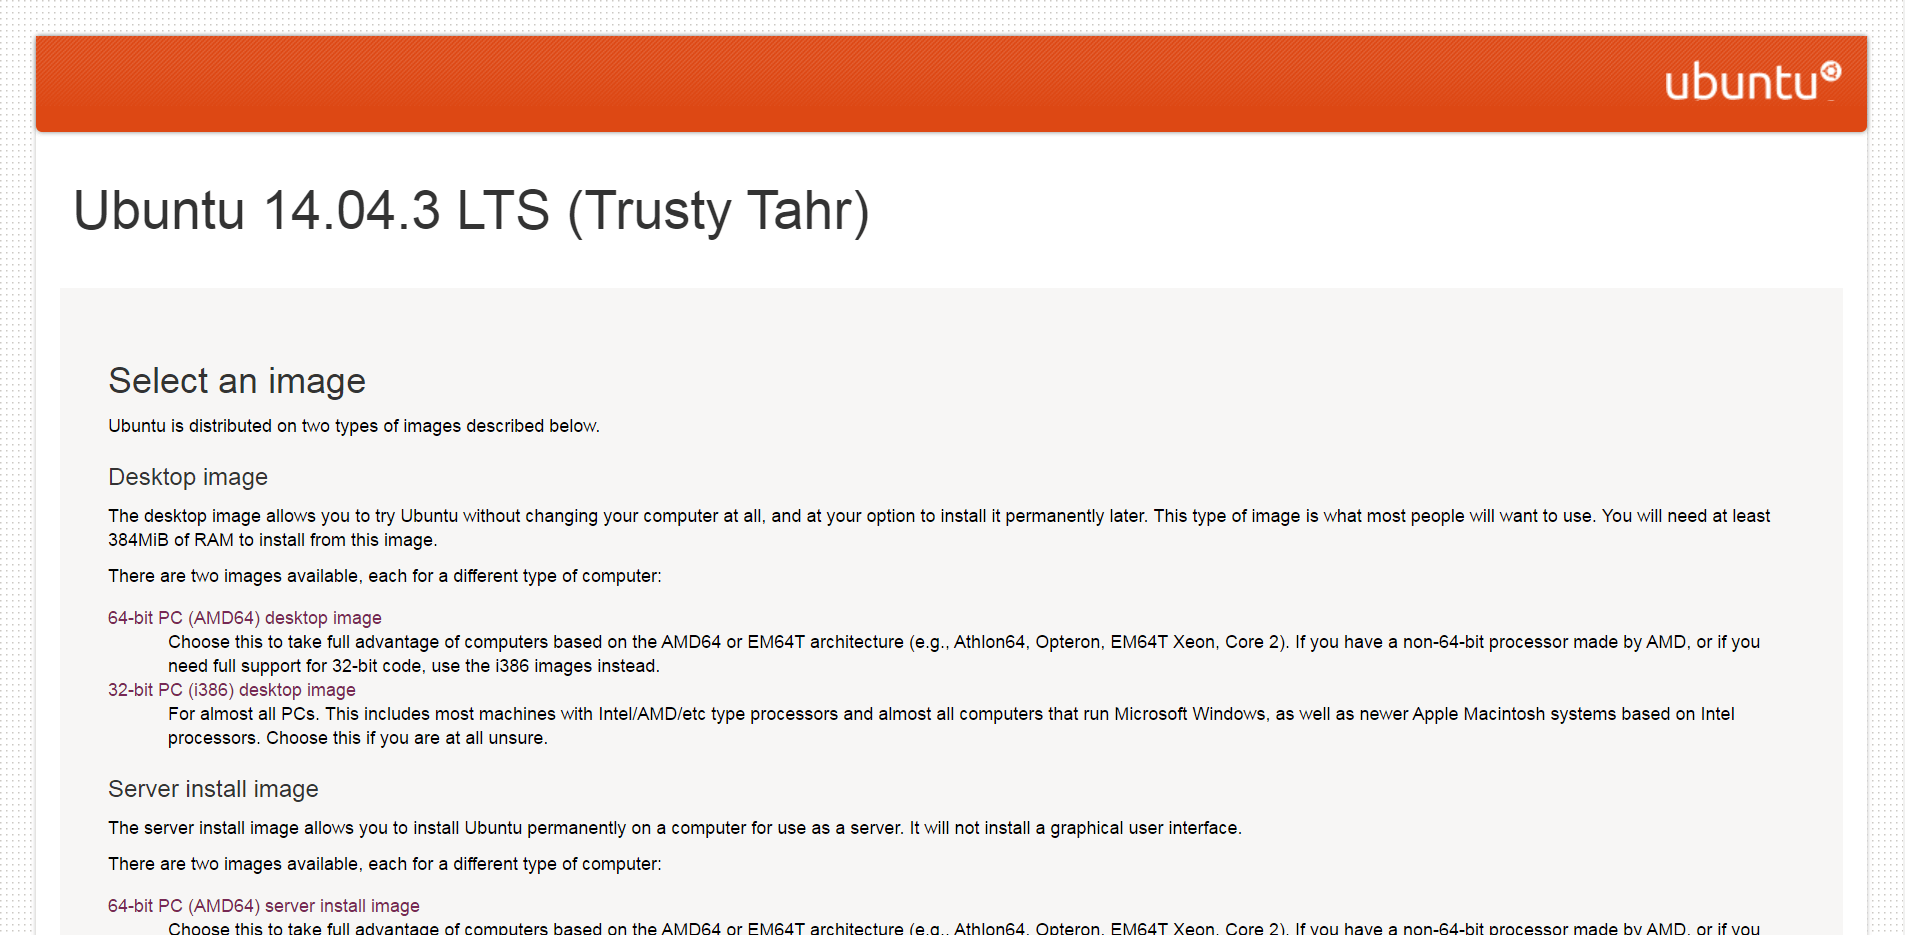
在剛剛的畫面點選 “Ubuntu 14.04.3 LTS (Trusty Tahr)” 或 “14.04” 或 “14.04.3” 以下載我們要的版本 14.04 ,14.04 後面的 .3 是在 14.04 正式發布後的後續更新版本,基本上屬於同一個版本,而不像 14.04 和 15.10 就是截然不同的兩個版本

Ubuntu 的版本號前面兩個數字代表西元年、後面代表月份,Ubuntu 每半年會發行一個新版本,也就是每年的4月及10月,所以我們才會看到 14.04, 14.10 這種版本號ubuntu download 14.04.3
閱讀全文

Ubuntu based GNU/Linux 上的防火牆 (ufw) 基本設定

早期在 Linux 上設定防火牆多事透過 iptables 這隻程式在下規則,不過說真的,對於新手或是要求很基本的使用者來說,iptables 有些功能其實用不到,例如 nat, forward等等的, 而且語法有點複雜,我自己也是常常要邊翻 man page 、筆記邊操作,後來有了令一套全名叫作 Uncomplicated Firewall 的 ufw,意思就是簡單的、不複雜的防火牆,相對於 iptables 來說,ufw 是真的簡單很多了!ufw其實只是一個 iptables 的前端設定程式,最後的規則都還是會走 iptables ,而且比較複雜的功能還是要直接透過 iptables 才有辦法做到!如果想看 ufw 設定完的 iptables 結果只要用這個命令就可以看到了:iptables -L -n

今天來講一下 ufw 的 “基本” 使用方式,Ubuntu 14.04 有內建 ufw,Debian要自行安裝,透過 apt-get 就可以了:

$ sudo apt-get install ufw

接下來示範的操作都在 Ubuntu 14.04 上面進行,不同的系統可能會略有出入,但應該都大同小異。

ufw 預設是停用的,要啟用 ufw 的話命令如下,關鍵字分別是 enable 和 disable,也就是啟用和停用,因為需要 root 權限,所以命令前面會加上 sudo:

$ sudo ufw enable
 Firewall is active and enabled on system startup

同樣的,停用 ufw 會這樣做:

$ sudo ufw disable
 Firewall stopped and disabled on system startup

要確認 ufw 已經啟用,可以看一下 ufw 的 status:

已啟用的結果:

$ sudo ufw status
Status: active

未啟用的結果:

$ sudo ufw status
Status: inactive

那防火牆的允許跟禁止規則怎麼下呢?
關鍵字是 allow 跟 deny,allow 表示允許,deny 表示拒絕

先講怎麼設定防火牆預設行為,也就是對於沒有手動設定規則的連線該怎麼處理

比較安全的設定方式,建議把預設連入設定為 deny ,也就是沒有手動設定允許通過的連線就會被擋下來:

$ sudo ufw default deny

明確一點的指令是這樣:

$ sudo ufw default deny incoming
閱讀全文

Stop the annoying USB power autosuspend under GNU/Linux

Got a problem that the usb mouse will been poweroff/suspend periodically on Linuxmint 17 when the notebook is not in ac mode, here is a quick fix without rebooting system:

echo "-1" | sudo tee /sys/bus/usb/devices/*/power/autosuspend_delay_ms
echo "on" | sudo tee /sys/bus/usb/devices/*/power/control

For permanent change, for example on Debian / Ubuntu based GNU/Linux, with usbcore module:

echo "options usbcore autosuspend=-1" | sudo tee /etc/modprobe.d/disable-usb-autosuspend.conf 
options usbcore autosuspend=-1

Reference:

Linux kernel Power Management for USB documentation:
https://www.kernel.org/doc/Documentation/usb/power-management.txt

How to disable auto power off of usb devices like usb mouse?
http://askubuntu.com/a/301416