Remove Exif info in jpg image under command line

Exif, stands for Exchangeable image file format, which we usually use to recognize the camera manufacturer, model, exposure time in a digital photo, it is a standard that specifies the formats for images, sound, and ancillary tags used by digital cameras (or digital devices in nowadays, like smart phones and tablets), scanners and other systems handling image and sound files recorded by digital cameras.
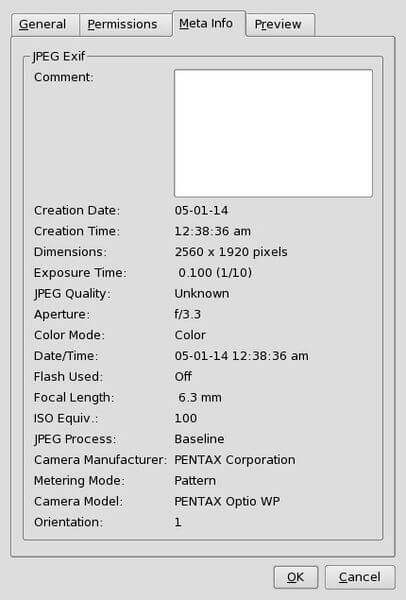
406px-Konqueror_Exif_data.jpg
Exif in JPEG image example from Wikipedia: https://en.wikipedia.org/wiki/File:Konqueror_Exif_data.jpg

Exif can help us know more about the photos and audios, but may also leaks the valuable and privacy info if you don’t want to let others know that you just want to share pictures with others, it will also cost a small disk space, but if you don’t need it or you don’t want it, it’s also a waste of disk space, so you may want to remove that info like me in some situation. Here is the steps to remove Exif under command line.

Install exiftool:

$ sudo pkg install p5-Image-ExifTool # FreeBSD
$ sudo apt-get install libimage-exiftool-perl # Debian / Ubuntu based GNU/Linux
$ sudo yum install perl-Image-ExifTool # RedHat / Fedora based GNU/Linux

Make sure you can now use exiftool:

$ exiftool -ver # show the installed version of exiftool
9.46

If you would like to see the current exist info, use this command, filename.jpg is the picture you want to manipulate:

$ exiftool -all filename.jpg

Now you can remove Exif info:

$ exiftool -all= filename.jpg

By default, it will backup your file to filename_oringinal, like filename.jpg -> filename.jpg_original, so you don’t need to worry about the backup, if you don’t want it, you can also add parameter -overwrite_original to prevent to backup file been generated.

After you remove the Exif info, you will find the modified file be a little bit smaller now.

$ exiftool -all= filename.JPG
1 image files updated

$ ls -l
-rw-r--r-- 1 peter peter 1609796 Apr 24 16:09 filename.jpg
-rw-r--r-- 1 peter peter 1614079 Apr 24 16:08 filename.jpg_original

If you take a look at its info, you will find that there are only some basic info remaining:

$ exiftool -all filename.jpg
ExifTool Version Number : 10.10
File Name : DSC_0470.JPG
Directory : .
File Size : 1572 kB
File Modification Date/Time : 2016:04:24 16:09:43+08:00
File Access Date/Time : 2016:04:24 16:09:43+08:00
File Inode Change Date/Time : 2016:04:24 16:09:43+08:00
File Permissions : rw-r--r--
File Type : JPEG
File Type Extension : jpg
MIME Type : image/jpeg
Image Width : 3920
Image Height : 2204
Encoding Process : Baseline DCT, Huffman coding
Bits Per Sample : 8
Color Components : 3
Y Cb Cr Sub Sampling : YCbCr4:2:0 (2 2)
Image Size : 3920x2204
Megapixels : 8.6

That’s all.

Use ‘jpegoptim’ to optimize/re-compress your jpg images

I use optipng and jpegoptim to help me compress/optimize my jpg/png images.

For png images re-compression, please refer to:

jpegoptim supports many platform, including Solaris, Mac OS X and Windows, of course FreeBSD and Linux, here is its git repository on GitHub:
https://github.com/tjko/jpegoptim

How to install?

FreeBSD:

$ sudo pkg install jpegoptim

For Debian/Ubuntu based GNU/Linux:

$ sudo apt-get install jpegoptim

For CentOS/RHEL/Fedora based GNU/Linux

$ sudo yum install jpegoptim

(on CentOS/RHEL, please enable EPEL repo first)

How to use?

$ jpegoptim image.jpg

By default, jpegoptim uses ‘lossless‘ mode to re-compress the jpeg images, which means the optimized images will have the same quality just like it was, to make the images smaller, you can use -m<quality>, --max=<quality> to enable lossy optimize by setting its quality, the valid range is 0 – 100, for example, set quality = 90:

$ jpegoptim -m 90 example.jpg

Note that the files that already have lower quality setting will be compressed using the lossless optimization method.

You can also use `find` to help you compress all the jpeg images:

$ find /path/to/imgs -name "*.jpg" -exec jpegoptim -m 90 {} \;

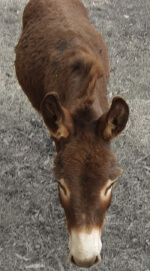
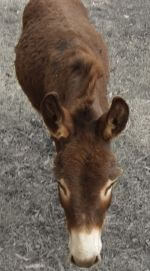
Using this picture on Wikipedia as an exmaple: https://wikipedia.org/wiki/File:JPEG_example_donkey_100.jpg

jpegoptim-example

Before the compression, 36239 bytes (about 36 KB):

JPEG_example_donkey_100


After the compression, 10145 bytes (about 10 KB):

JPEG_example_donkey_80

Can you recognize which one has better/lower quality? :D

簡易反轉 PDF 顏色和把 PDF 轉成圖檔的方法

Imagemagick-logo

這篇要用的工具是 ImageMagick (wiki)

imagemagick 是一套不管是在 Linux, FreeBSD, Windows 或 Mac OS X 上都很容易取得的工具,其主要功能是各種圖檔的檢視、編輯、轉換

FreeBSD 安裝: $ sudo pkg install ImageMagick
Debian / Ubuntu based GNU/Linux 安裝: $ sudo apt-get install imagemagick
CentOS / Fedora based GNU/Linux 安裝: $ sudo yum install ImageMagick
Mac OS X 使用 MacPorts 安裝: $ sudo port install ImageMagick
Mac OS X 使用 Homebrew 安裝: $ brew install imagemagick

嫌版本太舊、或是上面沒提到、還是沒有套件管理功能的作業系統請自己從這邊找:http://imagemagick.org/script/binary-releases.php

安裝完 ImageMagick 後會有一個 convert 的 command 可以用

閱讀全文

Use ‘optipng’ to optimize/re-compress your png images losslessly!

OptiPNG is a useful tool to compress png images without loss its quality, it really help reduce the bandwidth, diskspace and the loading/response time for website. I used it to re-compress all the png images on cdnjs and successfully made 206857 images smaller(see cdnjs/cdnjs@e936c87e9044fd2b123).

It’s easy to use, you can install it via apt-get, or download and build it from source :
$ sudo apt-get install optipng

Usage:
$ optipng example.png

The default compress level is 2, the range is 0~7 (may depends on the version you are using), I will always use the highest and slowest level:
$ optipng -o7 example.png

Find all the png images to compress:
$ find path -name "*.png" -exec optipng -o7 {} \;

In fact, optipng can convert BMP, GIF, PNM and TIFF format image to optimized optimized png, and also performs PNG integrity checks and corrections, very nice.